How to successfully create a low-tech planted aquarium in 15 simple steps
Article Index
1. Lighting – What type of lighting do I need for my natural low-tech aquarium?
2. Soil – Why should I use dirt and no filter in my natural planted aquarium?
3. CO2 – Should I add CO2 to my low-tech aquarium?
4. Cost – How much does it cost to set up a natural, low-tech aquarium?
5. Setup – How do you set up a natural, low-tech aquarium the right way, the first time?
⇒ Introduction: What is a low-tech planted aquarium?
1. First an foremost it is a planted aquarium that is usually heavily planted.
2. CO2 is not added to the aquarium.
3. In general all nutrients needed for the plants is introduced through the use of soil, the nutrients in the water and nutrients added to the tank by feeding the inhabitants.
4. Lighting for the plants is through artificial lighting.
5. The goal with a natural, low-tech aquarium is to create a self sustaining bio-habitat that can be enjoyed without having to spend a lot of time on maintenance.
A natural tank setup is somewhat similar to taking a small portion of a slow moving tropical stream and placing it straight into your aquarium. You would have dirt, plants and just a few small fish.
Whether you’re new to aquarium fishkeeping or have been in the hobby for a while you are very aware of how expensive an aquarium set up can be.
Starting with a new 55 gallon tank and stand then adding just the high intensity lighting, an automated CO2 system and large number if good quality plants can set you back $500 to $1,000 (and more).
If you are like me, spending $1,000 for a high-tech setup might as well be a million dollars. Just never gonna happen in the foreseeable future.
I don’t have a problem with high-tech aquariums. In the right hands a high-tech aquarium can be extraordinarily beautiful. But, I will also say that I left the hobby for 10 years because I was burnt out on maintaining and monitoring my aquariums, high-tech and otherwise.
Because of this burnout I was going to need to do things differently if I was to get back into keeping aquariums. Then I found out about natural low-tech, low maintenance and low cost aquarium keeping.
Make money keeping fish...
I do
Consider creating your own income producing website, just like I did with this one! I advertise Divi website creator, but you could place other ads on your website.
I've used Divi Wordpress website builder to build this site, and it's incredibly user-friendly. With its drag-and-drop interface, creating your own website becomes a breeze.
Simply tap this box to get started and see how easy it is to create a website with Divi.
The cost is $89/year. This is $7.41 per month. Divi comes with a 30 money-back guarantee. Try it at no risk.
Take this box to visit the Divi website to learn more. The link opens in a new window.

* Great Video: How to make a Website | Divi Tutorial 2024
⇒ 1. What type of lighting do I need for my natural, low-tech planted aquarium?
* Important: In general low-tech, planted aquariums plants will use less light than a high-tech tank. You will need to experiment and see what you plants respond to and keep an eye on algae growth.
When I set up my first planted aquarium back in the early 90’s I remember buying two 175 watt, metal halide pendant lights. I think they were $200 each. This was an ungodly amount of money considering my income at the time. Replacing a bulb for these fixtures ran around $60. Back then 3 watts of light were recommended for each gallon of water.
Now aquarium lights are amazingly inexpensive. They are also much more efficient.
* Important: But how do you know how strong your lighting should be for your aquarium? I figure that out with my light meter. I have an inexpensive light meter which measures light intensity in “lux”. Using “lux” I know what light intensity I am giving my plants so I can adjust the lighting. I can better figure out the amount of time the lights need to be on to suit the needs of my plants.
What is lux? “Lux is used as a measure of the intensity, as perceived by the human eye, of light that hits or passes through a surface.” Wikipedia
Below is a chart of daytime lux from Wikipedia:

My 2.8 gallon tank has a 6 watt LED “Nicrew brand” light. Four inches from this light the lux is 8000. This might be too much for the fish and could cause an algae bloom. I am prepared to either raise the light fixture or cover some of the LEDs. Since I know exactly how much light is going into my tank I can easily and precisely adjust it to work correctly for my setup.
So for lighting I would recommend buying a light meter to use. You can see a picture of my light meter below. I would also recommend reading reviews of lights that you are considering for your aquarium. I have found that other hobbyist’s input really helps in making the correct purchases for my tanks.
As a side note, you could also experiment with supplementing your aquarium lighting with natural sunlight. For example I have a window in my bedroom which has a built-in shelf where I could easily place a 10 gallon tank. I could adjust the amount of natural lighting by opening or closing the mini blind slats.

Tap the light to view prices of small aquarium lights on Amazon
How to grow huge, healthy aquarium plants

⇒ 2. Why should I use dirt and no filtration in my aquarium?
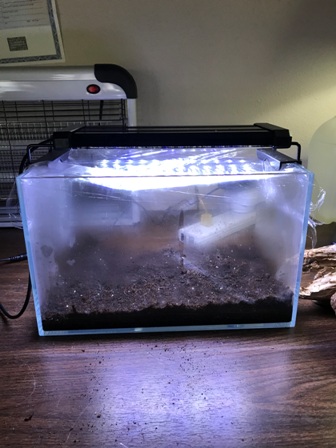
Above: My nano, with dirt and a light.
Buy a tank like this one on Amazon – click this link to check prices
I follow Diana Walstad’s advice from her book “Ecology Of The Planted Aquarium” by using soil and gravel or sand in my low-tech planted aquariums but no undergravel filter. She recommends using 1” to 1.5” layer of organic potting soil in the bottom of your tank (See the picture of my 10 gallon below this section) covered with 1” of 1.5” of gravel or sand. No undergravel filter should be used.
An update 3 years after this article was written: Picture above is my most recent nano. 2 gallons. There is organic potting soil and Eco complete. If you look at the substrate you will see a faint white line this the window screen material separating the soil from the gravel. I am also advocating a filter for the water movement and the prevention of bio-film.
Dirt creates a very natural “safe-space” for bacteria to cycle aquarium debris and waste into nitrate and CO2. Without these two chemicals your plants won’t grow. With the bacteria in the soil they are created naturally.
Diana also recommends not using an external filter for your planted tank. You really won’t need it and the turbulence it causes on the surface of the water will strip the naturally created CO2 out of your tank. Update: A gentle flow filter will not do too much harm to the CO2 levels. In my opinion, there is more value to having one than not having one.
With deeper tanks an internal filter could be used to increase the water circulation and help clear the water. A powerhead attached to a sponge filter and place deep in the tank would work perfectly for this.

Image above: One of my nano’s with dirt on the bottom.
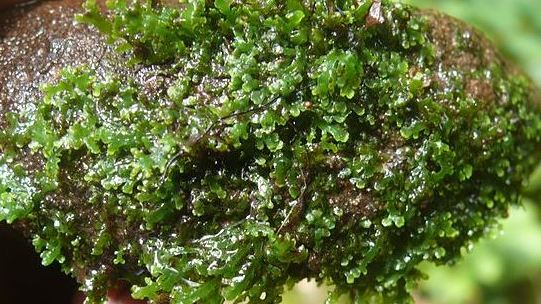
Carpeting Plants For Your Tank

⇒ 3. Should I add CO2 to my planted aquarium?
No, you don’t need to add CO2 to a natural planted aquarium.
As mentioned before the natural cycling of debris and fish waste in the aquarium creates natural nutrients including CO2 for the plants in the aquarium while cleaning the water of chemicals that would harm fish if left unchecked.
So…it’s important to NOT clean your tank too much. Cleaning the tank can interrupt the nitrate / CO2 cycle by removing the waste which would normally be converted to CO2 and plant nutrients.
Regular cleaning of your natural low-tech aquarium will have a strong negative impact on the health of the tank. For an example of how often to clean your tanks, Diana Walstad cleans her tanks every six months or longer. She just keeps them topped off when the water evaporates.
Update: After having a snail die off I realized that not vacuuming the very top of the substrate allows harmful bacteria and parasites to grow. Even Diana mentions this in scientific paper she posted on line. In that paper she recommended the use of an aquarium UV light to control the bacteria and parasites.
At this time I am advocating an “almost touching” cleaning of the substrate, just to remove the invisible “nastie.” Every three months? Not sure how often yet.
So, go have some fun. Don’t worry about cleaning your low-tech natural aquarium. It’s cleaning itself while you play.
⇒ 4. How much does it cost to set up a natural, low-tech planted aquarium?
Cost of setting up a low-tech aquarium varies from person to person because of desire of outcome and differences in monetary resources.
The average person will want the “biggest bang for the buck.” Let’s start with that assumption.
For the sake of this article we’ll say that a 10 gallon low-tech setup will be sufficient as a “starter tank”. Here is the run-down of costs:
Just today I bought a 10 gallon aquarium from Walmart for $16 with tax.
For the substrate I bought organic potting soil for about $5.00.
To go under the substate I am using the red lava sand that is everywhere in St George, UT, where I live. I dug up a shovel full, cleaned it and now it’s ready to go. No cost. (See picture above.)
I will be setting the aquarium up near a window but will need lights as a supplement. By the time you read this I will have bought a “Nicrew Classic 20” aquarium light for my new tank. Cost for this is $27. (Here is the Amazon link to check prices on aquarium lights.)
For heat I have a new 50 watt heater which cost $20 (Price check heaters by tapping this Amazon link)
I can get a stick on thermometer for $2.
I don’t intend to buy a filter for this tank.
I already have water conditioner and a siphon.
I plan on spending around $100 for plants and using the dry-start method to grow them out before adding water to the tank.
I plan on understocking the fish, so let’s say $20 for fish.
So, altogether I will have spent $190. Let’s say $200 all told.
Spending $200 for a small, natural, low-tech, low-maintenance tank sound much better than say $500 for a similar set up.
Now you have everything you need to start your low-tech aquarium. You’ll want to set it up properly, the first time. I read on the aquarium forum all the time about people who set up their low-tech aquarium “half a__ed” and then wonder why they have algae and why their aquarium plants are dying.
Read on if you really want to create a natural low-tech, low maintenance aquarium.
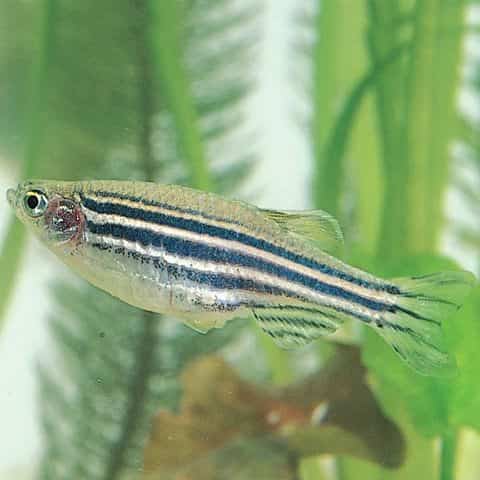
Zebra Danios
How To Grow Beautiful Aquarium Plants Without Substrate
⇒ 5. How do I set up a low-tech planted aquarium the right way, in 15 simple steps
1. Start with an aquarium that is clean inside and out.
2. Fill the bottom of the aquarium tank with 1.5” of organic potting soil. Remove the sticks and any other large debris from the soil.
3. Top the potting soil with 1.5” of gravel or sand.
4. Next you’ll take steps to dry-start the plants.
5. Very gently add water to wet the dirt being careful not to disturb the gravel / sand / dirt. I pour the water onto my hand and then allow the water to drip onto the substrate. Fill with water to the top of the soil
6. Now plant your plants. Plant the plants deep enough so that their roots are in the soil.
7. After all of the plants are planted, cover the tank with plastic wrap. You’re trying to keep the air and the plants moist in the tank (as if they were in the tropics). Do provide a small ½ inche hole in the plastic so that outside air can circulate into the tank.
8. Set your lights to be on 12 hours per day and put them over the tank.
9. Allow the plants to grow 6 to 10 weeks until they have filled the tank to your liking. Keep an eye on the water level. Be patient.
10. As an FYI I lightly mist the plants once a week with a weak fertilizer water mix. I do this because the tank isn’t cycling yet, so a little extra plant food shouldn’t hurt. I’ll have to experiment with this.
11. Once the plants are fully grown you will add tap water to your tank, again being careful not to disturb the dirt / gravel / plants.
12. Make sure the water has been treated to neutralize chlorine and chloramine. Also, make sure the water temp is as close to 78 degrees F as possible.
13. Place your heater in the tank and turn it on. Or, if you’re like me you have your tank sitting on a plant germination pad set to heat the tank to 78 degrees F.
14. You are going to “cycle” the tank for at least two weeks. Add a tiny amount of fish food every few days. You do this to help the bacterial colony grow large and strong.
15. After at least two weeks you can add fish appropriate to your tank size. You want the tank understocked (fewer fish than you really want). Overstocking the tank will cause harmful bacteria or fungus to grow in your tank which will have a detrimental effect on your fish.
FYI: Dupla Products Company recommends feeding your fish once every other day. I never had any problems with my fish when I kept to this feeding schedule. In fact I watched Neon Tetras spawn daily on this diet.
Goldfish as a food fish

⇒ A question I answered in a fish keeping forum
The Issue:
My plants are exhibiting very poor growth. Nothing I do seems to help. I have been facing small amounts of green beard algae and a brown sludge algae which I assume to be diatoms. This tank is well established being over 2 years old now. Many of the plants develop holes or the leaves seem to rot away.
This is my first forum post. I have been a fan of the forum and read many posts searching for help with no conclusion.
Stocking:
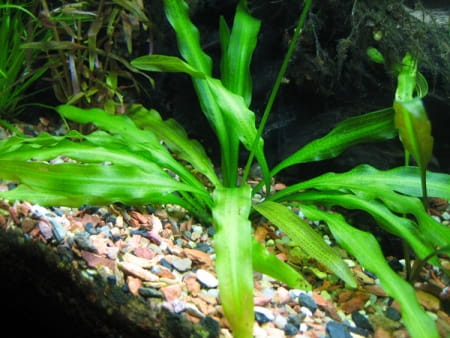
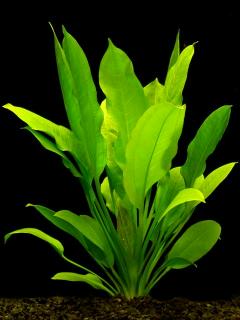
My tank is 10 gallons with Rotala, Dwarf Sag, Anubius, an Amazon Sword, Java Moss, and Amazon Frogbit. The tank is stocked with a male
Betta, 7 new Glowlight Tetras, a few Corydoras, and two mystery snails.
Equipment:
The tank is light by a 20″ finnex stingray which is said to provide low-medium lighting for 7 hours a day with a siesta period of 3 hours between light periods. I have a DIY citric acid/baking soda CO2 setup running at around 30ppm. I have an aquaclear 20 and a small powerhead used to diffuse the CO2. My temperature is a constant 78 degrees.
Dosing:
I have been dosing with EI ferts according to the instructions for a 10 gallon tank. I have also been dosing Flourish Iron once a week. I perform a 50% water change every week.
Parameters:
Ph: 6.6
Kh: 2
Gh: 5
My Answer:
“I’ve read Diana Walstad’s book “Ecology of the Planted Aquarium” (one of the “bibles” of low-tech aquariums) several times. You are doing a few things differently than she recommends for a easy care low-tech aquarium. If you decide to make these changes I think you will experience the success you’re looking for.
1. You didn’t mention the use of dirt in your aquarium. I might have missed that. Diana recommends 1″ to 1.5″ of organic soil in the bottom of an aquarium. That should be covered in 1″ to 1.5″ inches of gravel or sand. Dirt helps support a very healthy colony of bacteria which break down plant and fish waste and uneaten food. These bacteria release nitrates (nitrogen cycle) and CO2. Between this and the very occasional, rare water change (water has other nutrients the plants need occasionally) you shouldn’t need to add fertilizer or CO2 to your tank.
2. A low-tech Walstad tank should never use an undergravel filter. Not saying you have one, just mentioning.
3. Try your darndest to eliminate water turbulence from the surface of the water (waves and bubbles or any other movement). Turbulence removes CO2 from the water therefore interfering with the growth of your plants. Just say no to powerheads and air pumps. You want a very smooth, undisturbed water surface. If you have to have filtration (highly unlikely with a 10 gallon tank) use a small powerhead attached to a sponge filter placed toward the bottom of your tank. Proper placement will keep water turbulence to a minimum.
4. Stop adding fertilizer and CO2 to your tank. A true low-tech tank won’t need them.
5. Stop doing so many water changes. You’re getting rid of the materials the bacteria use to help feed your plants. Diana’s book mentions water changes every month to 3 months. Top off evaporated water with Reverse Osmosis water. You can buy a gallon at the store for about $1.50 and this should last several months.
6. When you are doing water changes avoid cleaning the gravel/dirt. Leave the bacteria in peace and they will help you create your masterpiece.
Unfortunately, right now, you are making it hard for your aquarium plants to grow and easy for algae to thrive.
If you decide to follow these ideas you will spend less time working on your tank and more time enjoying it.”
You can turn your aquarium fish hobby into an income producing side hustle.
Create a website like mine to earn enough to buy aquariums, or fish, or equipment or if you work hard enough, retire from your 9 to 5.
I used "Divi" website creator to make this website. It costs $89/year (this comes out to about $7/month.)
Tap this ad to find out more.
Farlowella Catfish – Whiptail Catfish, Twig Catfish – Farlowella oxyrryncha
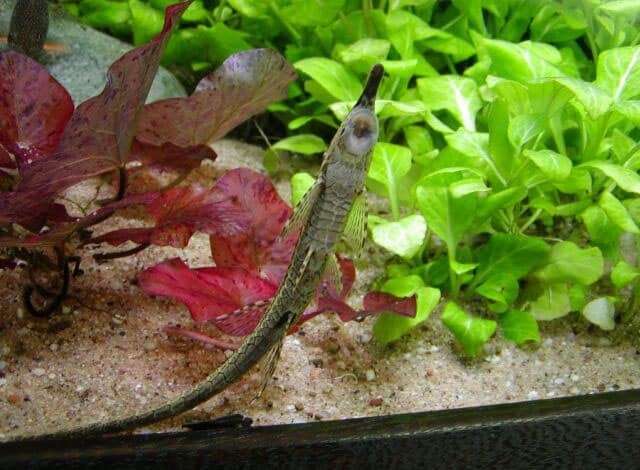
“An omnivorous species. In its natural environment, it feeds mainly on algae. In the aquarium, this catfish may not readily accept dry foods, and alternative foods such as fresh vegetables should be given. Once dry foods are accepted, feed them plant-based and spirulina algae foods regularly.”
Ammonia in your aquarium!
Fish care, fish Diseases
⇒ 7 Steps To Control Algae
Unless you like algae? If so go to: LoveAlgae.com