How do you grow the best live fish food for your aquarium fish? 8 easy types
Do you want to grow live fish foods for your freshwater aquarium fish?
From insects to water wigglers, here is a good information
Easy to grow and affordable.
Live Food #1 Daphnia

How big to daphnia get? Will they fit in the mouths of my fish?
Daphnia sizes are from 0.3 to 0.6 millimeters or (.08 inches to .2 inches.) .08 is probably the size of a printed period (.). These should fit in to just about any mature size fishes mouth.
I bought some a week ago and found that my fish couldn’t see them. Too small.
What do daphnia eat?
Daphnia live on algae, bacteria, and protists (protists: single-cell organism that is neither plant, animal or fungus).
You will need to grow daphnia food if you want to grow daphnia.
To grow food for daphnia, find a glass or translucent container (a small unused aquarium would work perfectly). You should place this container near bright light but away from direct sunlight.
To the container, add lettuce, spirulina, yeast or best, farm animal dung. Fill your container with conditioned water and your choice of the mentioned ingredients. Let this mixture ripen a few days near bright light to turn a light green and then add your daphnia.
Keep your daphnia culture at room temperature.
If you are successful, in no time, your green water will be filled with daphnia.
Video: How to Culture Daphnia with ZERO Cost | Unlimited Live Food For Our Fish
Yes, I really did this.
My Experience With Making Money Doing an Online Interview.
I made $60 for a 1 hour interview.
A while back I participated in an online video interview. It took less than an hour, and I received a $60 Amazon gift card. The company I signed up with (Respondent) has tons of different surveys and interviews to choose from. You can only be paid with gift cards, but honestly, I got some good stuff from Amazon for an hour of my time.
It’s easy, and if you choose well, it pays well. You make money, and if you complete $75 in surveys, I’ll also earn a little ($20). Win win for both of us.
Here are some of the surveys available as I write this:
-
Snack food interview — 23 minutes — $30
-
Work in e-commerce? — 20 minutes — $100
-
Content creators — 60 minutes — $100
![]()
Live Food #2 Bloodworms
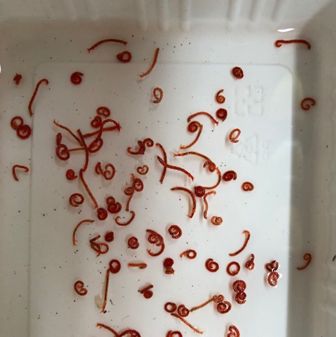
Image above: Bloodworms being sold by kelvintaminus0116 an eBay seller.
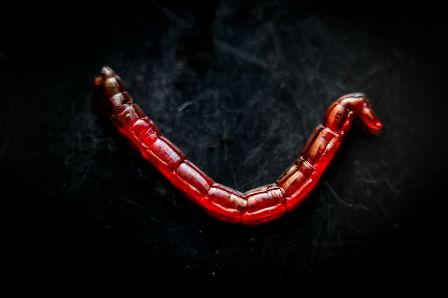
Bloodworms
I have good news and I have bad news…
After doing a ton of research, I concluded that finding and harvesting bloodworms as a live fish food is not worth the effort to an average (read busy) aquarist. I could change my mind later, but for now, this is what I’ve decided.
What I mean by this is, either you put in a great deal of effort to find bloodworms or bloodworm eggs in your area or you can try to grow them in a bucket outside your home by hoping to attract the adults to lay eggs in your bucket water.
Growing them in a bucket?
Growing them in a bucket at home might give you a dozen a week. But, a strong caveat: I suspect that if you live in the desert, like I do, you’re out of luck. Where I live it’s hot in the summer (115 F is not unheard of here) and it is freezing in the winter.
I believe that the bucket method could grow mosquito larvae in my area (instead of bloodworms). Of course, that would be a different article section.
If you live in a wet area, you might try hunting for bloodworms. We don’t have ponds here, so no hunting for eggs or larvae will be happening.
Best way to collect bloodworms
Let’s be honest. It is so, so much easier to buy them live, online. Why spend the time and effort to find and grow them?
So, bottom line, buy live bloodworms online and have them mailed to you. This is realistic and much easier.
That’s my story and I’m stickin’ to it.
P.S. I don’t know if this happens to everyone, but I find handling bloodworms fresh, frozen or dried to be extremely irritating to mucous membranes. Try not to touch your eyes after handling them, like I always seem to do.

My pick for Best On Ebay for "Live Fishfood":
LIVE FISH FOOD: MOINA MACROCOPA EGGS (WATER FLEA)
Choice was based on:
⇒ The cost is excellent.
⇒ Live fish food, just add water.
⇒ Seller has 160 reviews all 100% positive.

Tap this box to view current price
Do Your Own SEO
You Can Get My DIY SEO System For Only $17.
Why pay an SEO person hundreds per month when you can do it yourself?
Dear Website Owner,
As you read this bear in mind that I'm not some internet website Guru. I'm just an average guy who has figured out a little about website SEO.
You originally started your blog to make money. Now the website is just sitting there, kind of taking up space online and taking money out of your pocket every month. Been there, done that. For example, my aquarium blog has been around since 2019. I work on it for a while, then set it aside (again!).
About a year ago I started teaching myself SEO by watching hundreds of hours of YouTube videos. I then developed my own DIY SEO system—a simple system that almost anyone could use. I tried it and it worked.
Before you dismiss this, here are a few of my results (I use Bing search for this snapshot because I believe Google currently relies too heavily on A.I. and sponsored ads):
#4 for Chinese Algae Eater Care (plantedaquariumexpert.com/chinese-algae-eater)
#1 for Rosette Sword Plant (plantedaquariumexpert.com/rosette-sword)
#1 for What to Feed Your Chinese Algae Eater (plantedaquariumexpert.com/feed-chinese-algae-eaters)
Get more information by tapping this box.
Live Food #3 Brine Shrimp
How to grow brine shrimp to adults:
Here is my “down and dirty” take on growing brine shrimp from eggs to adults.
1. I have grown a LOT of brine shrimp. My information here on a lot of experience.
2. To grow baby brine shrimp, just follow the directions listed above. Remember the baby brine shrimp are tiny, so large fish won’t be able to see them.
3. I’ve grown brine shrimp to adulthood by using a large plastic tub filled with salt water. A small aquarium would also work. I purchased and used a saltwater hydrometer to make sure the salinity would stay in the correct range for brine shrimp to grow to adulthood. I made sure there was strong water movement by using an air pump and air stones. Feeding them a good portion of spirulina algae every day will get the job done.
4. If I remember right, it took 2 to 4 weeks to grow the brine shrimp to adulthood (It’s been 30 years since I last did this).
5. To keep the cycle going, I added more brine shrimp eggs to the water every 3 or 4 days or when I harvested some brine shrimp. You will get babies and adults using this method.
6. To harvest the brine shrimp, turn off the air pump to allow the egg cysts (shells) to fall to the bottom of the container. Then, to catch the brine shrimp, use a regular fish net instead of a brine shrimp net. This will allow most of the babies to fall back into the water.
If you are past a certain age, or if you watch a lot of cartoons. Odds are you’ve heard of “sea monkeys.” Sea monkeys are small creatures in kits marketed towards kids, promising them they could hatch and grow their own little civilization. Sea monkeys were actually hybrid versions of artemia (brine shrimp), a group of primitive crustaceans.
The bad news is you can’t create an empire of sea people to worship you. You can grow artemia species into delightful live food for your freshwater fish, however.
It’s anticlimactic, but such is life.
Artemia Salina – Brine Shimp
Artemia salina is the scientific name of brine shrimp, one of the most popular live fish food for aquariums. Despite growing in saltwater, the species is safe to feed to freshwater fish. They are incredibly adaptable and can survive up to 30 minutes in freshwater. This gives plenty of time for your fish to eat their live treat.
Brine shrimp produce dormant eggs. These eggs are available in most pet shops and online. Just be careful to purchase eggs that are labeled as high quality and have a high hatching rate.
How to grow baby brine shrimp as a live fish food (I’ve done this):
If you are just hatching baby brine shrimp, just about any container of a quart or more will work. If you are growing brine shrimp to adulthood, you’ll need a container of five gallons or more.
After picking your container, fill it with dechlorinated water because chloramine found in normal tap water will prevent the hatching of the eggs. Keep the container at room temperature. Bubble the water by connecting an air pump and an air stone to provide oxygen and water movement. Add one tablespoon of sea salt per pint (2 cups) of water. Or better yet, buy a hydrometer so you can make certain you have enough salt in the water. Your last step is to add brine shrimp eggs. An eighth of a teaspoon per pint of salt water will work. Brine shrimp eggs usually hatch within 24 to 36 hours.
You don’t need to wait much after that since small fish absolutely love eating freshly hatched brine shrimp. However, if you are interested in growing them to adulthood, you can always move them to a different tank, and slightly increase the temperature, to encourage breeding. Feeding them isn’t an issue either, as adding Spirulina algae, brewer’s yeast, or cooked egg yolk.
Live Food #4: Microworms

Live foods from Amazon? Yep.
Tap the picture to price or buy
Were you surprised by the unusual cleanliness of growing brine shrimp? Don’t worry, nasty is back with a vengeance.
Panagrellus redivivus
Microworms are the common name of a particular type of nematodes, specifically Panagrellus redivivus. They are tiny, almost invisible to the naked eye, but are an ideal food for fry. This is essential, as fry have a high mortality rate, and a rich source of protein can make the difference to whether they live or die.
Plenty of stores sell microworm starter kits, but you must make sure it’s any of the aforementioned panagrellus variants, as others have the potential to sicken your fish.
The requirements for growing this species are quite simple. First, any waterproof container with a lid is good enough, as long as you poke holes in the lid, to keep good airflow to oxygenate your culture. Despite this, ventilation should be done through small holes. Otherwise, the particular scents overflowing from the container will attract many undesirable visitors.
How to start a microworm culture
To establish the culture, you will require food for the microworms. There are several types of foods you can feed your microworms. An oatmeal/yeast mix is by far the most common pick. Cook the oatmeal in water to make a thick paste. Place the cooked oatmeal at the bottom of the container in a layer approximately one-half inch thick.
Next, add a light sprinkling of active dry yeast and mix it into the oatmeal carefully. Now you can add the starter microworm culture.
The yeast will grow on the starch as the oatmeal decomposes, and the microworms will feed on the yeast. After three to seven days, you will have microworms covering the top of the oatmeal and the sides of the container.
It will smell exactly as awful as it sounds, so keep it away from the kitchen or dinner table.
Harvesting Microworms
Harvesting your newly prepared fishy gourmet meal is quite easy—wipe the microworms onto your fingertip (sorry, but that just sounds gross) or a Q-Tip, then swish them into your aquarium.
If all goes well, your culture will survive from two weeks to a month while you enjoy the fragrant perfume of your culture!


Live Food #5: Flightless Fruit Flies

Growing Fruit Flies
Live foods are about the best way to feed your freshwater aquarium fish.
Why?
Well, let’s take fruit flies for example: Fruit flies, like other live or frozen foods, are entirely made of what you would consider actual fish food.
What do I mean by that? If you look at the ingredients for processed fish foods, most of the ingredients are good for cows (they include corn, wheat, and soy), but not so much for fish. I rarely feed my fish processed fish food because of this.
So what about fruit flies? Fish food-wise, they are nutritious and delicious because they’re high in proteins and fats, but no corn, wheat, or soy.
Fruit flies are used to feed other animals besides fish. This includes frogs, geckos, and praying mantises. I haven’t seen this, but I’m sure they are also used to feed pet spiders.
This information is going to be about drosophila melanogaster fruit flies. This is the most common variety of fruit fly.
Luckily, this type of fruit fly has several mutations that are available to scientists and hobbyists. One of those mutations is wingless fruit flies, which are also called flightless fruit flies.
Growing fruit flies is super simple and easy.
You can obtain cultures of fruit flies from sellers on eBay for about $20 with shipping.
When you get them, you will want to start a second batch because the fruit fly cultures only last about 3 weeks. Then, every three weeks, start a new batch; this way, you won’t have to buy a fruit fly culture again.
Setting up a new culture of fruit flies:
You’ll want a container that is at least 20 ounces and that can be easily covered.
An idea for covering your culture is to use a face mask cut to size. This works well to let air in and keep “FF” and larvae in the container. Yes, you will be growing larvae, too.
To feed the fruit flies, mix a mashed overripe banana with instant mashed potato flakes, a very small amount of vinegar, and a few touches of yeast. Add enough water so it is nice and soft. Place enough of this mix in the bottom of your container so it is an inch or so deep.
Of note: This recipe is just one of dozens. This is the simplest I’ve found.
Next, the flies need something to crawl around on. Excelsior (it reminds me of dried peat moss) is commonly used. You can buy this at a craft store. You can also use cut-up pieces of stiff paper.
Now that your fruit fly paradise is set up, take a few flies from your first culture and knock them into the second culture. Quickly cover both containers.
Keep the containers at room temperature. Feed your fish fruit flies from the first culture while your second culture matures.
Since fruit flies grow from egg to full maturity in 4 days, it won’t take long to fill the second container with your homegrown fish food.
How to feed fruit flies to your fish
- Get a small jar to put your feeder fruit flies in. Place this in another larger container. This large container catches the escapees. A one-gallon zip-lock bag works great as the large container.
- Tap your fruit fly culture to move the flies to the bottom of the container. If you want flies crawling around your house, then skip this part.
- Open the lid of the culture and tap some flies into the smaller container.
- Now dump the fruit flies you’ve collected onto the top of the aquarium water. The FF are too small to sink and will skitter around until they are eaten by your fish.
Accept the gratitude of your fish, and you’re good to go with fruit flies.
Buy Fruit Flies on eBay by tapping here.
Drosophila melanogaster in nutrition research—the importance of standardizing experimental diets
Live Fish Food Shop – Your Premier Source for Live Aquarium Fish Food
Live Food #6: Blackworms
Growing Blackworms
From sludge to sushi: Transform your kitchen leftovers into a lively fish feast.
Raising blackworms to feed freshwater fish is an enjoyable activity that also helps save costs and offers nutritious meals for your aquarium animals.
Blackworms are tiny, segmented worms that inhabit freshwater areas and consume organic material. They contain a lot of protein and various nutrients.
To begin cultivating blackworms, obtain a plastic container that is not very deep, add some gravel meant for aquariums, fill it with dechlorinated water, and get an initial culture of blackworms. You may purchase a blackworm culture through the internet or at nearby shops selling aquarium fish.
Place around one inch of gravel into the container and pour water just enough to slightly cover it. Put the blackworms inside and store the container in a place that is both shaded and cool. Avoid direct sunlight and high temperatures, as they can harm the worms.
Give food to the blackworms once a week, using little portions of fish flake foods or fish food pellets. Be careful not to give them too much because it might make the water dirty and lead to mold developing. Remove any uneaten food and dead worms regularly.
To collect the blackworms, just use a small mesh net or even a turkey baster to pick up some worms from among the gravel. Make sure you wash them thoroughly prior to giving them to your fish. You might freeze extra worms to use later or give some to other people who enjoy the same hobby.
Lumbriculus variegatus: A Biology Profile
Lumbriculus variegatus – Wikipedia
Blackworms – Boreal Science Store – PDF
Collecting-Gathering Biophysics of the Blackworm L. variegatus
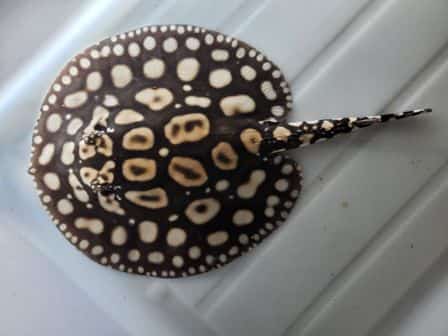
My pick for Best On Amazon for "Corydora Catfish":
Long Fin Panda Cory
Choice was based on:
* I've never seen a long fin corydora.
* Beautiful & somewhat unusual markings.
* Fish and seller have excellent reviews


Tap this box to view current price.
Live Food #7: Vinegar Worms
How to grow vinegar worms as live food for your freshwater aquarium fish.
If you keep freshwater fish as pets, below is an inexpensive and simple method to provide them with live food.
Vinegar worms are tiny nematodes (worms) that live in vinegar and eat apple peels. Fish find these worms very good to eat.
- Prepare a container. For this, you can use a jar made of plastic or glass. It could be an old pickle jar or Mason jar. It is important to clean the jar well and ensure that it’s dry prior to using it.
- Add some vinegar. Pour white or apple cider vinegar into the jar until it is half full.
- Put in some apple peels. Put some apple peels in the jar after cutting them up into little bits. Place enough peels into the jar to cover the bottom. The vinegar worms will eat the apple peels.
- Add some starter culture (vinegar worms) to your vinegar-filled jar. You are able to find vinegar worms at a pet shop or through an internet seller, or maybe you have a friend who has them and can give some to you. You only need a small amount of vinegar worms to start your own culture.
- Cover the jar with a cloth. Do not close the jar all the way because the vinegar worms require air to live. Cover the top of the jar with a cloth or paper towel, and use a rubber band or string to hold it in place.
- Keep the jar in a dark, room-temperature location. The best temperature for vinegar worms ranges from 70 to 80 degrees Fahrenheit, which is also 21 to 27 degrees Celsius. You might place the container in a cupboard, inside a closet, or beneath your bed. The vinegar worms can die in full sunlight or if placed near a heat source.
- Wait for the vinegar worms to multiply. It could be some days or even weeks before the vinegar worms get bigger and reproduce. This process will vary depending on how things are set up and how much of the beginning culture is there. When you notice small white dots moving in the vinegar, that’s when they’re ready to feed your fish.
- Harvest and feed your fish. To get the vinegar worms, separate them from the vinegar with a fine-mesh strainer or a coffee filter. Remove any extra vinegar from the worms by rinsing them with water. Then give them to your fish using a spoon or pipette. You can also freeze some vinegar worms to use later, or put them in a small jar with water and put it in the fridge for up to a week.
Live Food #8: Black Mosquito Larvae
How to grow black mosquito larvae as live food for your freshwater aquarium fish.
Sorry about the misleading title of this section. I have been feeding my fish “bottled” mosquito larvae for about a year.
My fish go nuts for this food.
I get the larvae from Amazon.com. It is manufactured by a company called UHT. It currently runs about $20/jar. I can usually get 20 or so feedings from a jar full.
I have learned to clean them off by placing some in a super fine net and and rinsing them in cold water. Then I feed my fish.
This food is about as fresh as you can get without growing your own.
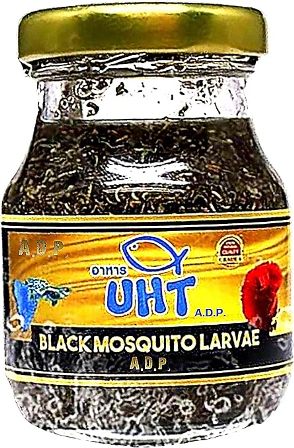
This is what I buy. Tap the image above to see current price on Amazon.
Conclusion? Live fish food possibilities are endless.
These are far from being your only options—hobbyist websites explore a plethora of viable alternatives, ranging from infusoria to ants, and anything in-between. Even regular mosquito larvae or fruit flies are a popular choice, as they are full of protein and nutrients.
As you can see, the world is full of possibilities when it comes to feeding your freshwater fish.
________________
References and further reading about live fish foods:
* Manual on the Production and Use of Live Food for Aquaculture
* Sustainable Technique for Selected Live Feed Culture
* Live Fish Food: Ultimate Guide to Types of Live Cultures – Fish Lab
Other pages on this site:
⇒ How to keep freshwater shrimp
⇒ 10 fast growing plants to help control algae in the planted aquarium
⇒ Taking photos of your aquarium using your smartphone
⇒ Aquarium Hobbyist Books & Gifts
⇒ My Top 3 Steps To Have Healthy Fish and A Healthy Aquarium

My pick for Best of Amazon "guppy fish"
Blue Dragon Guppies
⇒ Beautiful blue snake skin colors
⇒ Large tailfins
⇒ This fish has excellent ratings
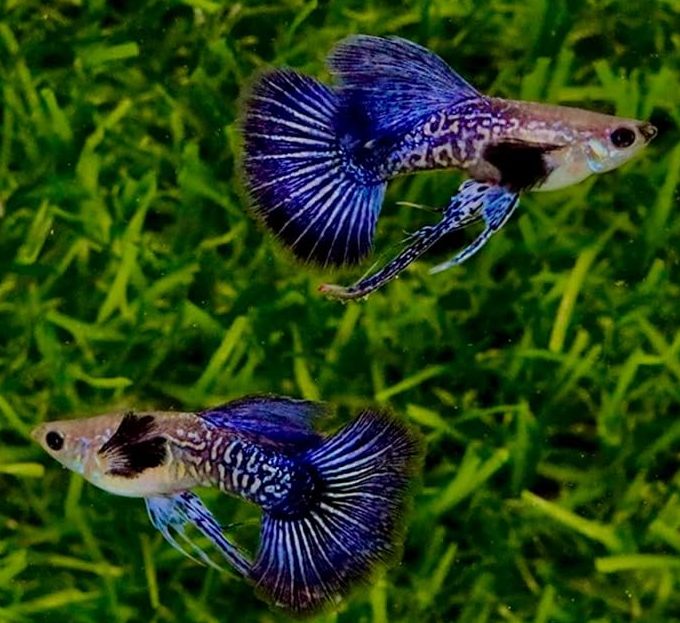
Tap this box to view current price.


